


Joe Grant, Principal Architect
For a recent project a client wanted to migrate their Oracle Application Server (OAS) environment to WebLogic (WLS). As a part of the application, they were using Oracle Internet Directory (OID) and Oracle Single Sign-On (SSO) to provide authentication for the application. The application was home grown and not an Oracle product. In addition, support for the version of SSO that they were running was near its end and the client was not interested in installing the replacement for SSO, Oracle Access Manager. They felt that this was too big a footprint for the simple authentication needed. As a result, they decided to migrate authentication from OID/SSO to OpenLDAP. The following post talks about how the task was accomplished and what I wish I knew before I got started.
This is the first of a 3-part series. In this post I will run through the OS installation for the OpenLDAP and WLS servers and the configuration of SLAPD for the OpenLDAP server. The next post in the series will discuss the data migration between the directory servers. The final post will be an overview of the WLS installation and the configuration of the security provider.
Some project basics in no particular order:
- The OS chosen for the project was Oracle Linux 6
- OpenLDAP version 2.4
- Very simple environment, just 1 WLS server and 1 OpenLDAP server. No LDAP replication and no need to authenticate to Active Directory.
- I use Apache Directory Studio as an LDAP browser, but whatever you prefer will work.
NOTE: In this case, the application is a home-grown app and is not an Oracle provided app. This is not a recommended solution for Oracle application such as E-Business Suite.
OS installation
First things first, we need to install the OS so that we have something to work with. In this case, I was working in a VMware ESXi environment so the OS was installed once with a minimal set of packages, converted to a template and then cloned to the needed VMs. Once deployed any additional software was added.
Figure 1: Boot Screen

Figure 2: Media Test
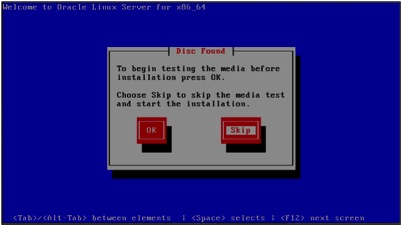
Figure 3: Splash Screen
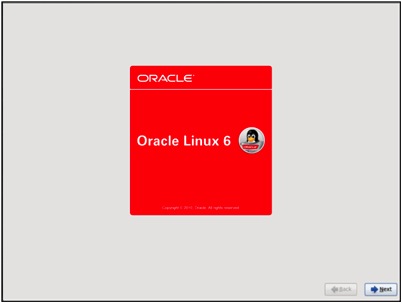
Figure 4: Select Language
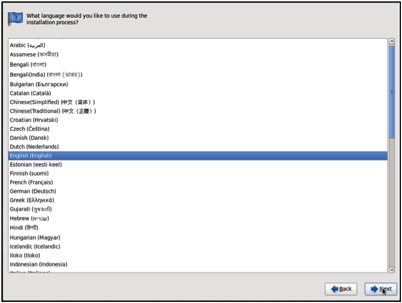
Figure 5: Keyboard Layout
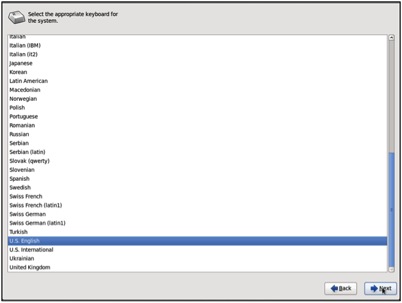
Figure 6: Storage
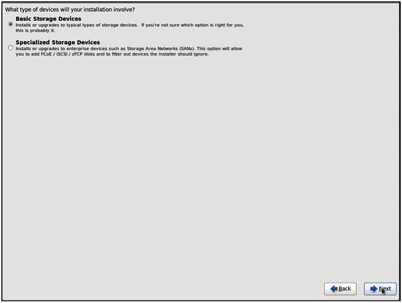
Figure 7: Set Hostname
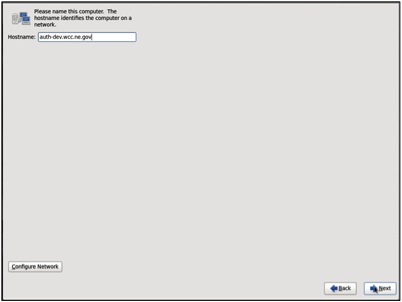
Figure 8: Set Time Zone
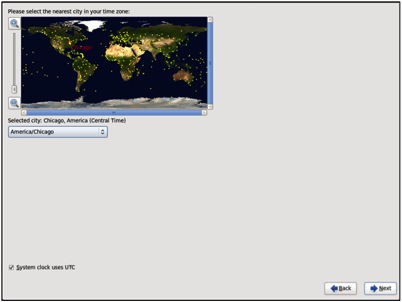
Figure 9: Set Root Password
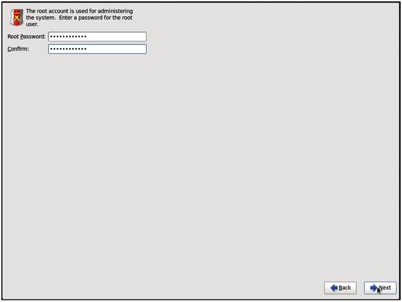
Figure 10: Storage
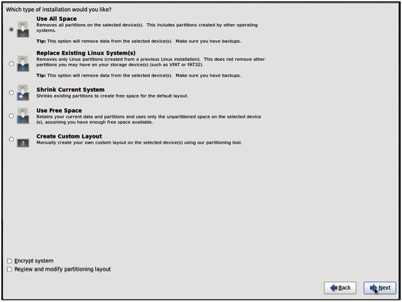
Figure 11: Installed Packages
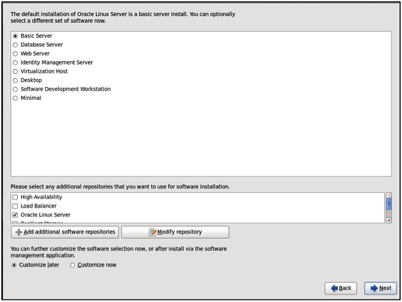
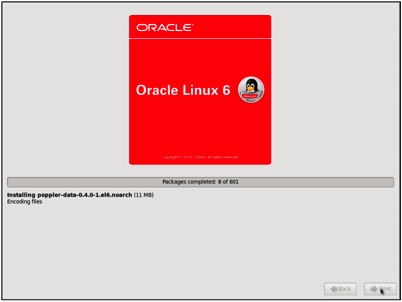
Figure 12: OS Installation
OpenLDAP installation
Once the template is cloned to the VM that is needed, the OpenLDAP software will need to be installed. This is done with the command “yum”. To install OpenLDAP, simply run the following as the root user.
# yum install openldap-servers openldap-clients
Follow any prompts to ensure that the packages are installed along with any dependencies.
OpenLDAP configuration
This is where things get a little complicated and a good understanding of LDAP directories really helps.
There are two ways in which to configure SLAPD. The first involves maintaining a configuration file and requires SLAPD to be restarted for configuration changes. This method has been deprecated. The second is called On Line Configuration (OLC), which is the newer method for configuration, and does not require down time for most configuration changes. The default configuration after the software is installed is OLC. I decided to use the OLC method for the configuration.
Changes to the config using OLC involve creating .ldif files for the changes and then using ldapadd or ldapmodify to implement them. This in turn will update the appropriate file in the configuration directory /etc/openldap/slapd.d. It is not recommended that you modify any file in the slapd.d directly. The only exception here will be when the default configuration is changed for the initial directory.
Create passwords
The first step is to get the hash value for 2 passwords using the tool “slappasswd”.
[root@openldap ~]# slappasswd

New password:

Re-enter new password:

{SSHA}VwD3dUbGEF/MXQAZsE11N4aCp8617AAWS


[root@openldap ~]# slappasswd

New password:

Re-enter new password:

{SSHA}A4KacK9LWlD8kzNdOm9nKUWNyAaiDr3q
Edit config files
The following configuration files will need to be edited to get a basic configuration for SLAPD going. Any text editor should work, I prefer vi.
/etc/openldap/slapd.d/cn=config/olcDatabase={0}config.ldif
Just after the parameter for olcRootDN add the parameter olcRootPW: <value> using one of the passwords generated with slappasswd. Also modify olcRootDN as desired. The initial value is cn=config and I changed it to cn=admin,cn=config to give it a more traditional account feel. The user set by olcRootDN in this file will be referred to as the Directory Manager.
olcRootDN: cn=admin,cn=config

olcRootPW: {SSHA}VwD3dUbGEF/MXQAZsE11N4aCp8617AAWS
/etc/openldap/slapd.d/cn=config/olcDatabase={[0-9]}[bdb|hdb].ldif
This is the main configuration for the directory. The number will likely by 0 or 1, but can be any number. The database will likely be bdb or hdb, but there are several other possibilities. For this project bdb was chosen and is the default. In this file the parameters olcSuffix, olcRootDN, and olcRootPW are set. The suffix for this example will be com. Some implementations will have a multiple layer suffix for example north.america.example.com. This does not easily allow for leafs or branches at the higher levels so com was chosen to keep things simple. The olcRootDN is not the same user as mentioned above. This user is for DIT management, the cn=config user is for managing the directory, but not the entries. For olcRootPW use the second password that was generated. The user set by the RootDN in this file will be referred to the DIT Manager.
olcSuffix: dc=com

olcRootDN: cn=manager,dc=com

olcRootPW: {SSHA}A4KacK9LWlD8kzNdOm9nKUWNyAaiDr3q
/etc/openldap/slapd.d/cn=config/olcDatabase([0-9]}.monitor.ldif
In this file, the default values are ok for everything except for oldAccess. This value just needs to be updated to reflect the chosen DIT manager user account.
olcAccess: {0}to * by dn.base="gidNumber=0+uidNumber=0,cn=peercred,cn=external,cn=auth" read by dn.base="cn=manager,dc=com" read by * none
Database configuration
As mentioned a bdb database will be used to hold the directory entries. This database does need an initial congfiuration and using the example configuration file does provide a good starting point. Simply copy the example file /usr/share/openldap-servers/DB_CONFIG.example to /var/lib/ldap/DB_CONFIG.
Restart services
At this point slapd needs to be restarted just to test the configuration so far. This is done as the root user using the service command.
# service slapd restart
Conclusion
So at this point you should have a running VM with OpenLDAP installed and the basic configuration ready to go. The next post will cover the next step in the process, migrating the LDAP entries from OID to OpenLDAP.
References
Online book OpenLDAP For Rocket Scientists. http://www.zytrax.com/books/ldap/
Print book from Packt Publishers. http://www.packtpub.com/OpenLDAP-Developers-Server-Open-Source-Linux/book
Apache Studio LDAP browser. http://directory.apache.org/studio/