Jeff Stonacek, Principal Architect
Introduction
There are two common ways to increase the amount of swap space in Linux, by either adding a storage device or adding a swap file on a filesystem. In certain situations however, it would be cleaner to merely increase the size of the existing swap device. This last method is the one that we will be discussing in this blog topic.
For this example we will be using a VMware virtual machine. The concepts are the same for a physical server, but the implementation steps would be slightly different. In this scenario, swap was created as a logical volume in the same volume group as the root filesystem, which is not an uncommon situation with today’s Linux builds. The specifics about the starting configuration are:
- One disk device attached to the machine
- Two partitions on the disk
- sda – /boot
- sdb – root volume group (rootvg)
- Swap is located on an 8 GB logical volume, swaplv
- There is zero free space in the rootvg volume group
The goal is to increase swap space to 16 GB by increasing swaplv in rootvg. However, rootvg has no free space, so there will be several steps involved in making this work. The high level steps are:
- Increase the size of the disk device for the machine
- Increase the size of the /dev/sda2 partition (rootvg)
- Make LVM aware of the new size of /dev/sda2
- Increase the size of the swaplv logical volume
- Make Linux aware of the new swap size
Increase the Disk Size
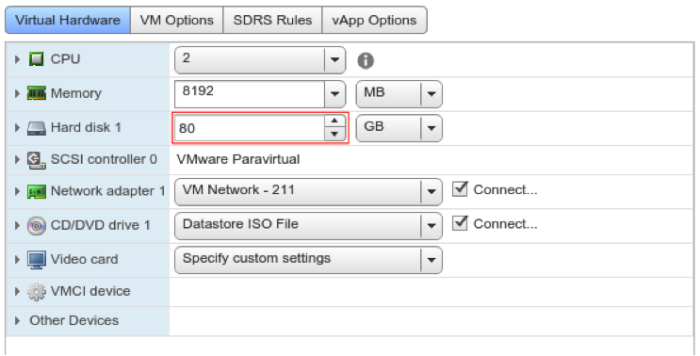
The focus of this blog is on the Linux steps needed to increase swap space in an existing device, not a VMware tutorial. So, we’ll gloss over the steps to increase the size of the virtual disk. In VMware, this step can be done with the virtual machine running. Modify the virtual machine properties and increase the size of the VMDK in question.
Increase the Size of the Disk Partition
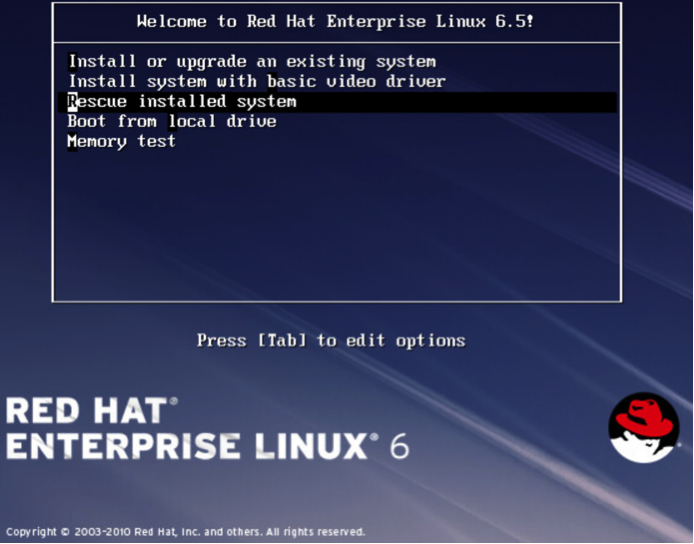
In our scenario, increasing the size of the disk partition is tricky as the partition in question contains the root filesystem. This means we will have to boot from alternative media to perform this task. There are many options for this, including the Linux system rescue CD (http://www.sysresccd.org). In our example we will simply boot from the Red Hat install ISO into rescue mode and drop into a shell prompt as shown below.
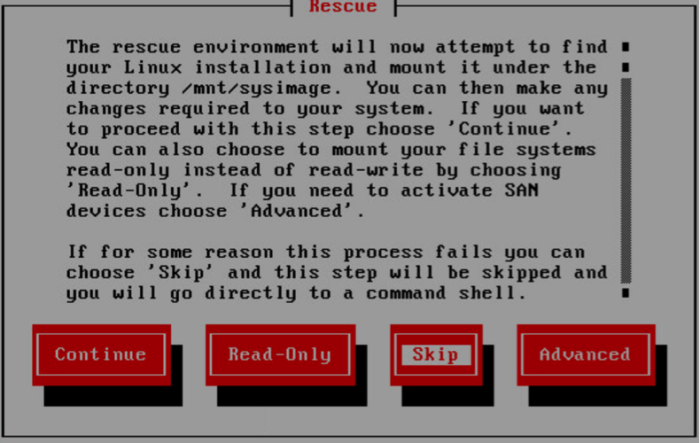
Boot into rescue mode. Do not start networking, or mount the local installation.
This will drop you into a shell logged in as user root.
The underlying disk has increased in size to 80 GB, so there is now free space on the disk. But, the partition is still sized at 70 GB. To change the size, delete the partition and re-add it with the same starting sector. This may seem a bit scary, but none of the data will be lost from the partition.
fdisk /dev/sda

Command (m for help): p

Disk /dev/sda: 85.9 GB, 85899345920 bytes
255 heads, 63 sectors/track, 10443 cylinders

Device Boot     Start         End     Blocks   Id System
/dev/sda1   *        1         26     204800   83 Linux
/dev/sda2           26       9137   73288530   8e Linux LVM

Command (m for help): d
Partition number (1-4): 2

Command (m for help): n
Command action
  e   extended
  p   primary partition (1-4)
p
Partition number (1-4): 2
First cylinder (26-10443, default 26): <enter>
Last cylinder, +cylinders or +size{K,M,G} (26-10443, default 10443): <enter>
Using default value 10443

Command (m for help): t
Selected partition 2
Hex code (type L to list codes): 8e

Command (m for help): p

Device Boot     Start         End     Blocks   Id  System
/dev/sda1   *       1          26     204800   83  Linux
Partition 1 does not end on cylinder boundary.
/dev/sda2          26       10443   83677573+  8e  Linux LVM

Command (m for help): w
The partition table has been altered!

Calling ioctl() to re-read partition table.
Syncing disks.
Reboot the machine as normal.
Increase LVM and Linux Components
Now we need to increase the size of the LVM physical volume (PV). When we list to attributes of the PV it still shows 70 GB for a size and zero free space.
# pvs
PV         VG     Fmt Attr PSize PFree
/dev/sda2 rootvg lvm2 a-- 69.78g   0
The command to resize a PV is, ironically, pvresize.
# pvresize /dev/sda2
Physical volume "/dev/sda2" changed
1 physical volume(s) resized / 0 physical volume(s) not resized

# pvs
PV         VG     Fmt Attr PSize PFree
/dev/sda2 rootvg lvm2 a-- 79.78g 10.00g

# vgs
VG     #PV #LV #SN Attr   VSize VFree
rootvg   1   3   0 wz--n- 79.78g 10.00g
Now our PV and VG show 10 GB of free space.
Next we need to increase the size of our logical volume (LV). Unfortunately, the LV in question is currently being used by the OS for swap space. We need to “swapoff” the LV first and then resize.
# swapon -s
Filename                            Type          Size   Used   Priority
/dev/dm-1                           partition  8388600      0      -1

# ls -al /dev/rootvg/swaplv
lrwxrwxrwx 1 root root 7 Dec 7 13:56 /dev/rootvg/swaplv -> ../dm-1
Swaplv is our only swap device and zero bytes are currently in use, probably because we just booted the machine.
# swapoff -v /dev/rootvg/swaplv
swapoff on /dev/rootvg/swaplv

# lvm lvresize /dev/rootvg/swaplv -L +8192M
Extending logical volume swaplv to 16.00 GiB
Logical volume swaplv successfully resized

# mkswap /dev/rootvg/swaplv
mkswap: /dev/rootvg/swaplv: warning: don't erase bootbits sectors
on whole disk. Use -f to force.
Setting up swapspace version 1, size = 16777212 KiB
no label, UUID=a68f819c-29da-4c5d-9c21-04a1de246209

# swapon -va
swapon on /dev/mapper/rootvg-swaplv
swapon: /dev/mapper/rootvg-swaplv: found swap signature: version 1, page-size
4, same byte order
swapon: /dev/mapper/rootvg-swaplv: pagesize=4096, swapsize=17179869184,
devsize=17179869184

># swapon -s
Filename                            Type           Size   Used   Priority
/dev/dm-1                           partition  16777208      0      -1
Conclusion
In this blog we have demonstrated the procedure for increasing a partition as well as the underlying LVM components and swap device. This procedure does require an outage, and provides the cleanest approach for resizing the main system swap device with no data loss.


