


Phil Ekins (@SQLPhilUK), Principal Architect
At House of Brick we regularly provide license based consulting across the SQL Server and Oracle database stacks. We have numerous blogs on the Oracle stack, but today we will be talking about SQL Server sprawl and its possible impact on licensing.
The term “SQL Sprawl” has been floating around the SQL community for a number of years, but for the purposes of this blog we will be defining it as “the SQL Server footprint within an organization having expanded beyond the IT department’s ability to manage, and/or the inventory (or lack thereof) of SQL Server is no longer a confident source of data”. This is typically termed as a License assessment.
With the prevalence of TechNet CDs (back in the day) and access to them, or more recently, ISO downloads (via MSDN or elsewhere), users can deploy an Enterprise installation to a PC under their desk. With this ease of installation comes the risk for a corporation to be audited, and exposure can be unknowingly, very high.
The first phase in identifying your SQL sprawl is to ask your organization some questions:
- What products are we currently licensed to run?
- What products are installed?
- Do these two numbers match?
- Who is installing SQL Server?
– Do they have a license? - Are we prepared for an Audit?
Part one of this blog series will discuss management strategies to prevent future sprawl as well as techniques to get a handle on the current sprawl. Part two will discuss the assessment of the newly discovered infrastructure and scenarios to consider during your review. Part three will walk through the logical next steps following an infrastructure assessment.
SQL Sprawl Part 1 – Getting a Handle on Your SQL Sprawl
When assessing your environment there are a number of techniques that can help locate wayward installs. The first step for me is always the work smarter not harder approach. Larger organizations typically have other existing systems that can be leveraged in your assessment. They may include:
Purchase Order System
- A PO system may give you access to a searchable set of data where you can look for SQL Server product versions and the owner who requested it.
- Even smaller organizations may have a physical drawer/credenza etc. with a stack of physical POs that can be sifted through during a search.
Software Asset Management System
- If an asset management system exists, then reporting will most likely be available to provide listings of SQL Server. Additionally, a database will most likely also be behind the scenes and your DBA team will no doubt have access (or know who to ask for it) and the skill set needed to query the data.
- First hand scenario – we created a nightly job to check for new appearances of SQL Server installs and generated an exception report to track down whether the instance is licensed correctly and whether it would be a better fit as a consolidation candidate.
Next we can leverage tooling and scripting to audit our environment. The various tools / scripts we will can use include:
- MS Assessment and Planning Toolkit (MAP)
- Active Directory (AD)
- PowerShell
- exe
- NMap
MAP Toolkit
This is a free Microsoft tool that can be downloaded here. The complete functionality of this tool is out of scope of this blog, but below we will walk through its use to locate SQL Server installs.
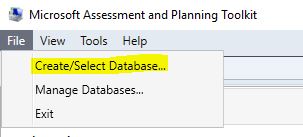
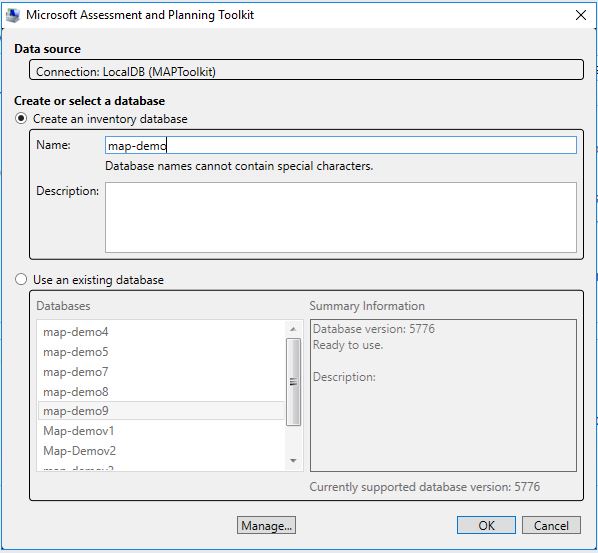
After installing the MAP tool (note: a SQL Server Express instance will be installed behind the scenes) and launching MAP, we first want to create a database.
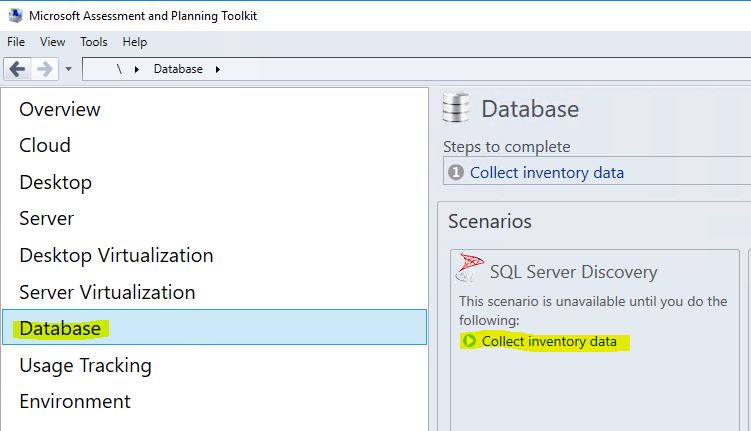
Then Select ‘Database’ on the left side of the screen and click on ‘Collect inventory data’.
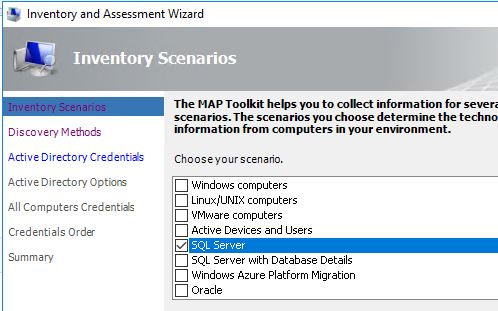
Next, select ‘SQL Server’.
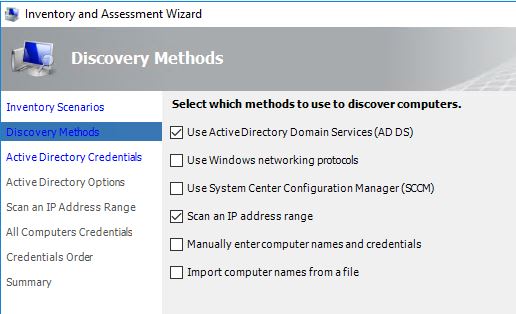
Select ‘Use Active Directory Domain Services (AD DS)’ and ‘Scan an IP address range’.
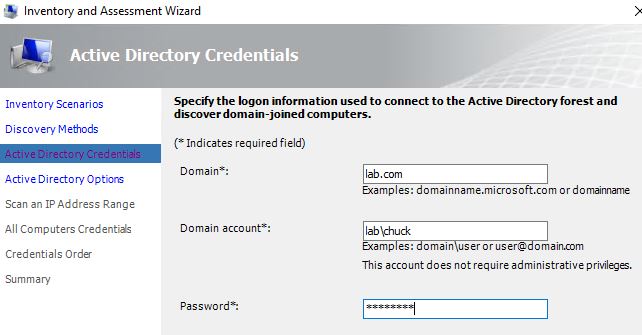
For AD credentials, we need to specify the domain and a valid account.
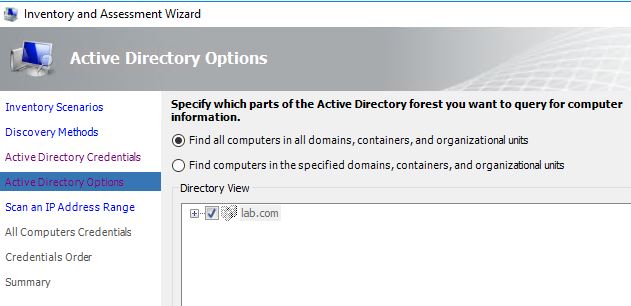
Next, for AD options, we have the option to focus on a subset of OUs. But for this exercise, we will target all OUs.
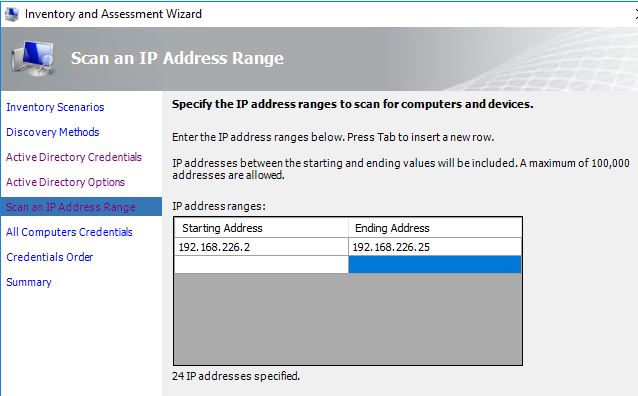
For the IP scan range, we will enter our lab range but we could enter multiple subnets (as needed).
We will specify an account that will have access to any computers found. You may want to work with the administration team however, for an appropriately elevated account here.
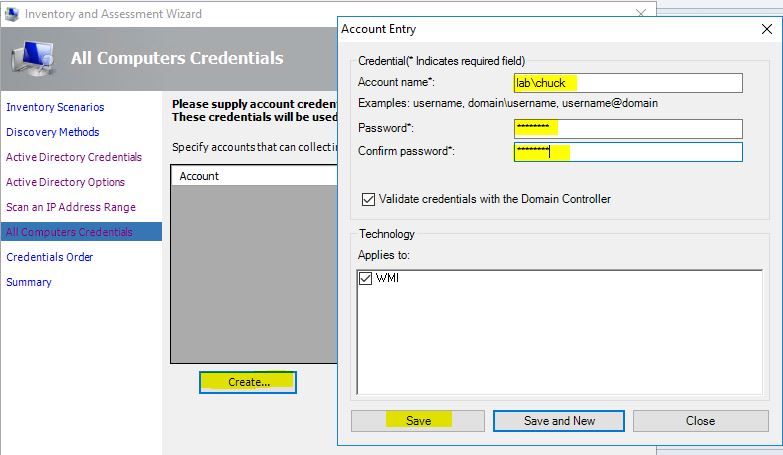
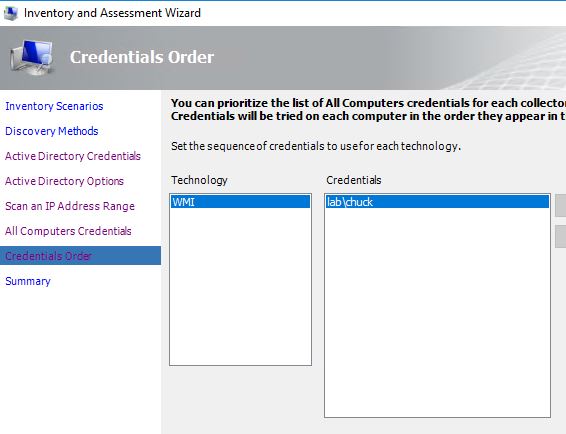
For the Credentials Order we will accept the preconfigured values, but if multiple accounts were configured you can set priority by technology as needed.
Finally, below is a summary of the check we are about to run.
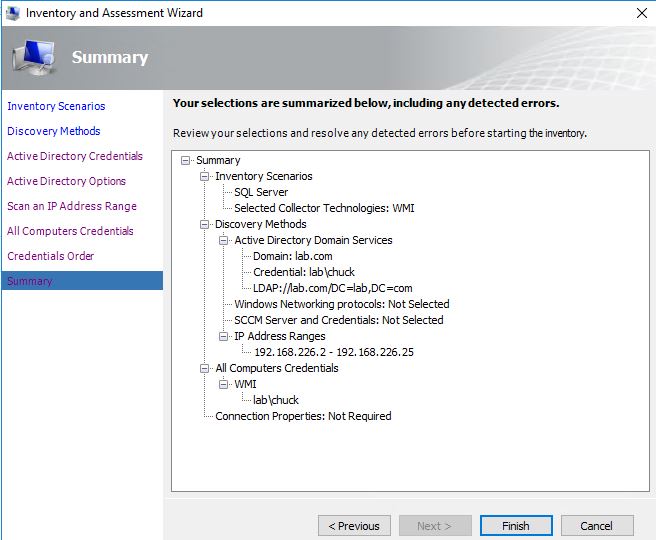
After clicking ‘Finish’ the collection will run. The execution time depends on the scale of ranges provided.
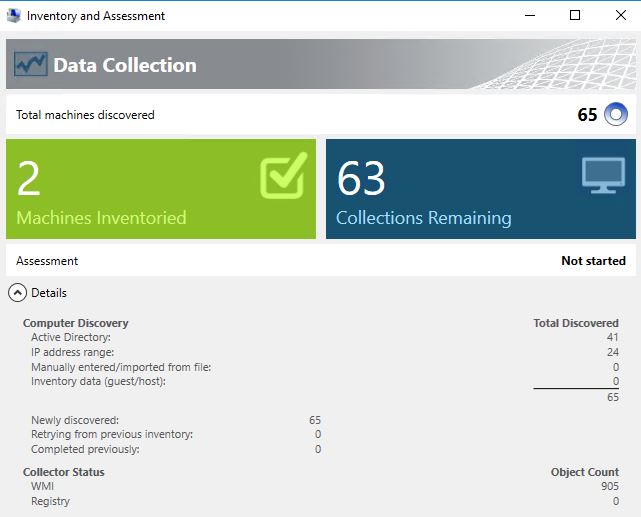
After the collection is complete, the MAP interface will display the results.

As the data is collected in a SQL Server Express instance, we can also directly select this data from the database we created against the (localdb)\maptoolkit instance.
SELECT * FROM [Map-demo].[SqlServer_Reporting].[SqlInventoryView]
Active Directory
Here we can leverage PowerShell to search AD for computer names as wildcard searches. *SQL* is probably the simplest approach, but if naming conventions are used, we can fine tune our criteria to target SQL. Conversely, we can also look for non-compliant names suggesting a non IT sanctioned machine.
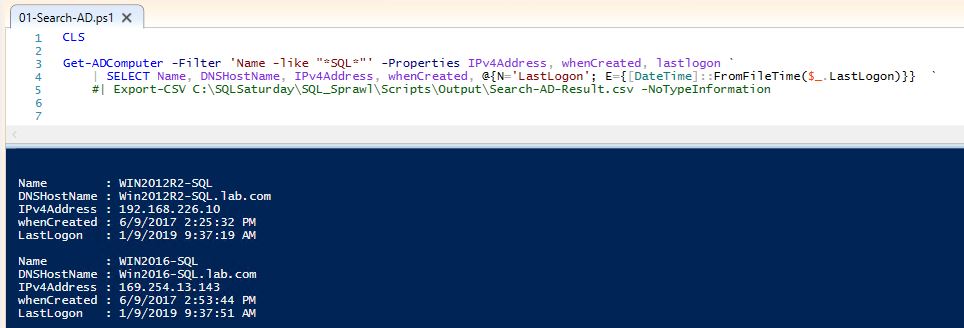
Get-ADComputer -Filter 'Name -like "*SQL*"' -Properties IPv4Address, whenCreated, lastlogon `
| SELECT Name, DNSHostName, IPv4Address, whenCreated, @{N='LastLogon'; E={[DateTime]::FromFileTime($_.LastLogon)}}  `
#| Export-CSV C:\Scripts\Output\Search-AD-Result.csv –NoTypeInformation
This script is using the Get-ADComputer method to search name for *SQL*, returning the name, dnshostname, IP Address, datetime entry was created, and last datetime a user logged into the computer with the resultset exported into a CSV file.
PowerShell Script
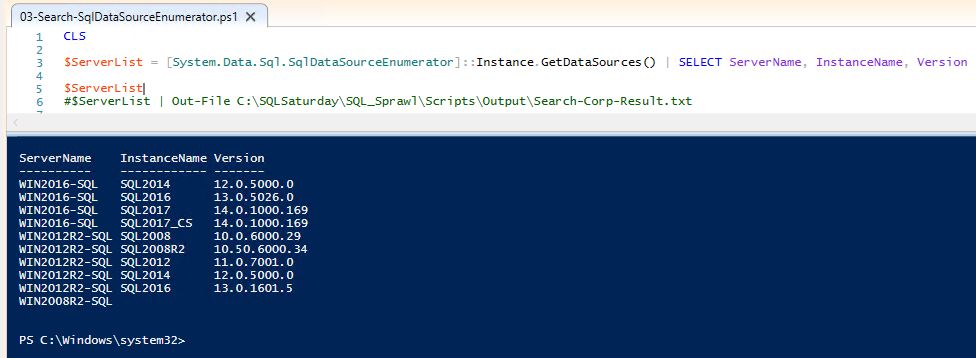
Here we will leverage a PowerShell call to search for SQL Server and output to a CSV.
The limitations of this approach may include firewall rules or the browser service not running; the results also may not be consistent between runs.
CLS
$ServerList = [System.Data.Sql.SqlDataSourceEnumerator]::Instance.GetDataSources() | SELECT
ServerName, InstanceName, Version

$ServerList
#$ServerList | Out-File C:\SQLSaturday\SQL_Sprawl\Scripts\Output\Search-Corp-Result.txt
SQLCmd
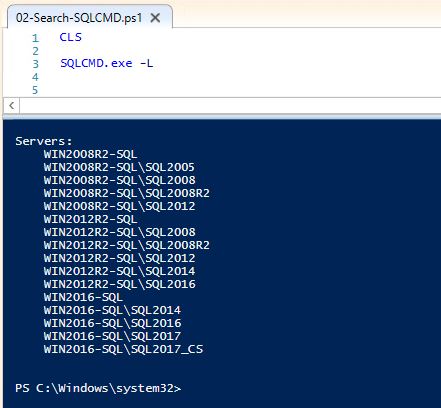
SQLCmd.exe also has functionality that allows us to search for SQL Servers, with the caveat of similar limitations as mentioned in the PowerShell Script section above.
CLS
SQLCMD.exe -L
NMap Utility
The network port scanning/mapping tool is an open source utility that can be downloaded here. It is a very powerful utility that can be used to search for SQL Server listening on ports.
Most network monitoring tools will alert on the activity NMap is generating, so there will always be a significant caveat associated with it. Therefore you should always check with, and get permission from, your networking team prior to running NMap. They may want to run it on your behalf or adjust an existing process.
Real World Example
During delivery of the SQL Sprawl material, the security officer in the room indicates that they scan their whole network nightly.
In this first demo, we will create a very tightly defined scope.
Focused Demo – NMap
The NMap command:
nmap -p T:1433 -sV 192.168.226.9-22 -oG C:\Search-Nmap-Focused-1433-Result.txt
Specify the port to check -p T:1433 (this is a TCP check against 1433), probe open ports –sV , the IP range 192.168.226.9-22 and output to a file –oG xxx.
We can also do a UDP scan against 1434 using -p U:1434 –sU
The complete script below also cleans up the output.
CLS
nmap -p T:1433 -sV 192.168.226.9-22 -oG C:\SQLSaturday\SQL_Sprawl\Scripts\Output\Search-Nmap-Focused-1433-Result.txt

$Rows = Get-Content C:\SQLSaturday\SQL_Sprawl\Scripts\Output\Search-Nmap-Focused-1433-Result.txt
ForEach ($Row IN $Rows) {
IF ($Row -Notlike '#*') {
IF($Row -like '*Ports:*') {
$StartPoint = $Row.IndexOf("Ports:") + 6
$PortArray = $Row.Substring($StartPoint).Split(",")
ForEach ($Port IN $PortArray) {
$PortDetails=$Port.Split("/")
IF (($PortDetails[4] -Like '*ms-sql-s*') -or ($PortDetails[5] -Like '*SQL Server*')) {
                               Write-Host $Row.Substring(0, $StartPoint) $Port
                               }
                        }
               }
        }
}
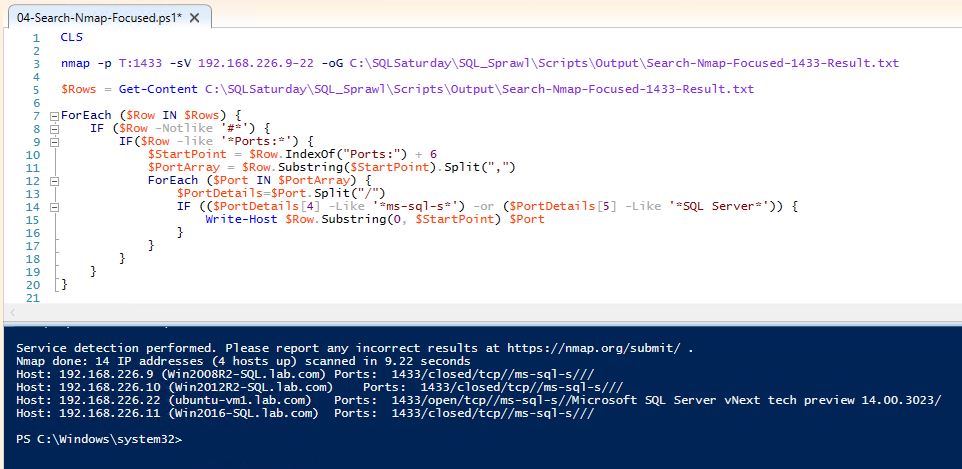
Note: We have, for the first time, identified a SQL on Linux instance. All prior collections did not catch this instance.
Sledgehammer Demo
For this demo, as the title suggests, we will be running a much more intrusive scan.
The NMap command:
nmap -p- -sV --version-intensity 8 192.168.226.9 -oG C:\SledgeHammer-Result.txt
The difference here is that the Port definition is –p- which means ALL ports. Additionally, the number of probes (which range from a light scan (0) to all probes (9)) is being set to 8 –version-intensity 8 and the IP range has been set to a single IP to reduce the demo execution time.
The same cleanup script is used.
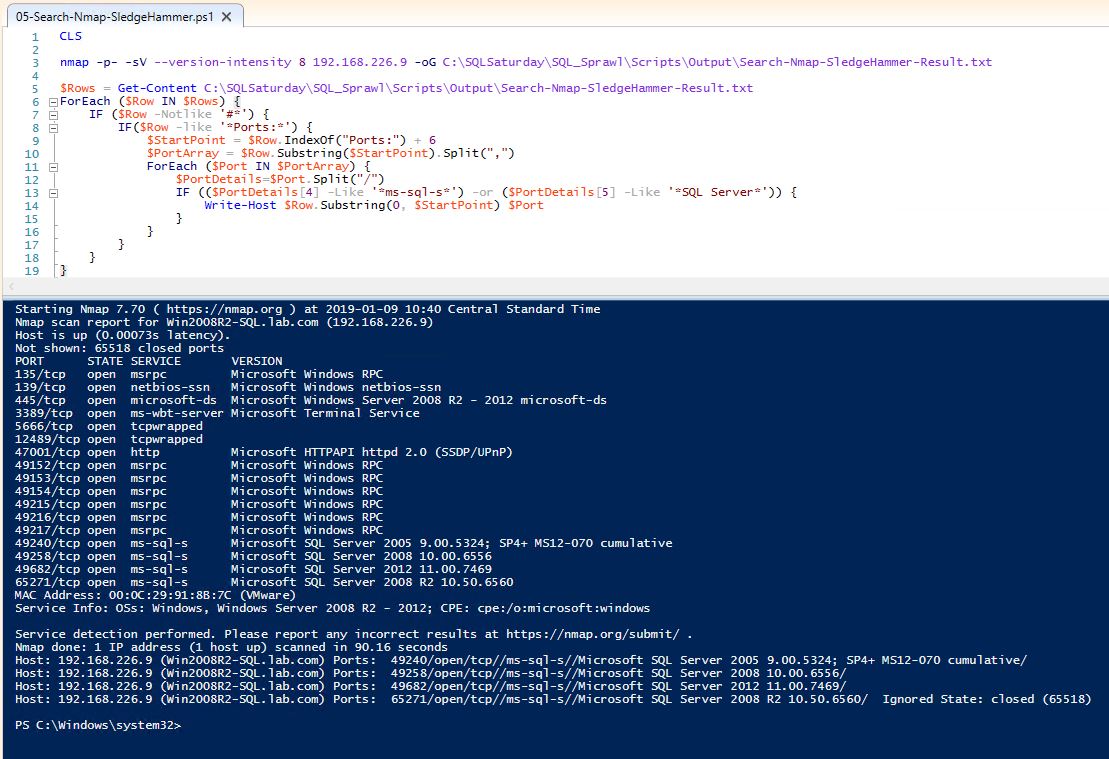
Make note of the higher level of detail in the output, but also the 90 second execution for a single IP.
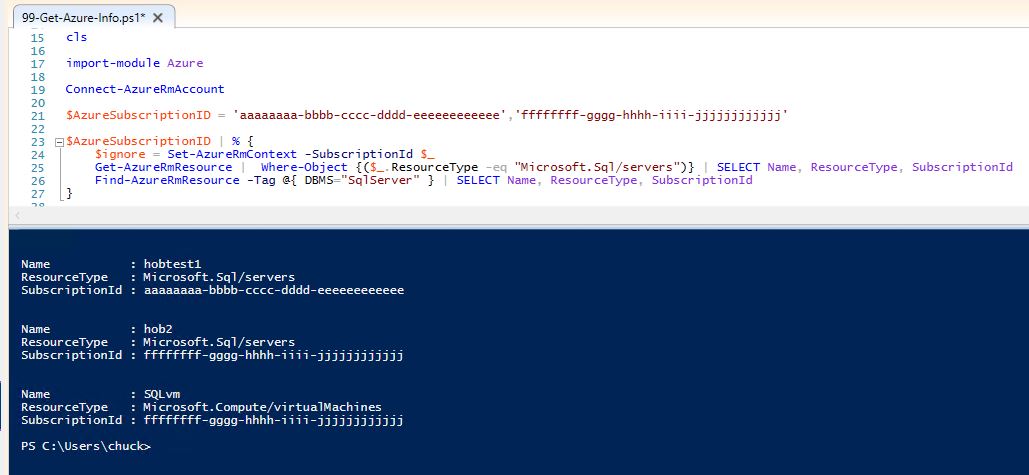
Azure Inventory
For the Azure Web Portal the ‘All Resources’ view gives you a listing of all your Azure subscription objects with filtering available. However, there is not an easy way to download the data right from the screen.
Using PowerShell, we can also query our Azure subscriptions to collect SQL Server resources. Here we will be using a Tag DBMS : SqlServer to help filter virtual machines and the resource type for selecting SQL Server databases.
Azure is segmented by subscription, so we need to interrogate each subscription separately.
CLS

import-module Azure

Connect-AzureRmAccount

$AzureSubscriptionID = 'aaaaaaaa-bbbb-cccc-dddd-eeeeeeeeeeee','ffffffff-gggg-hhhh-iiii-jjjjjjjjjjjj'

$AzureSubscriptionID | % {
$ignore = Set-AzureRmContext -SubscriptionId $_
Get-AzureRmResource |  Where-Object {($_.ResourceType -eq "Microsoft.Sql/servers")} | SELECT Name, ResourceType, SubscriptionId
Find-AzureRmResource -Tag @{ DBMS="SqlServer" } | SELECT Name, ResourceType, SubscriptionId
}
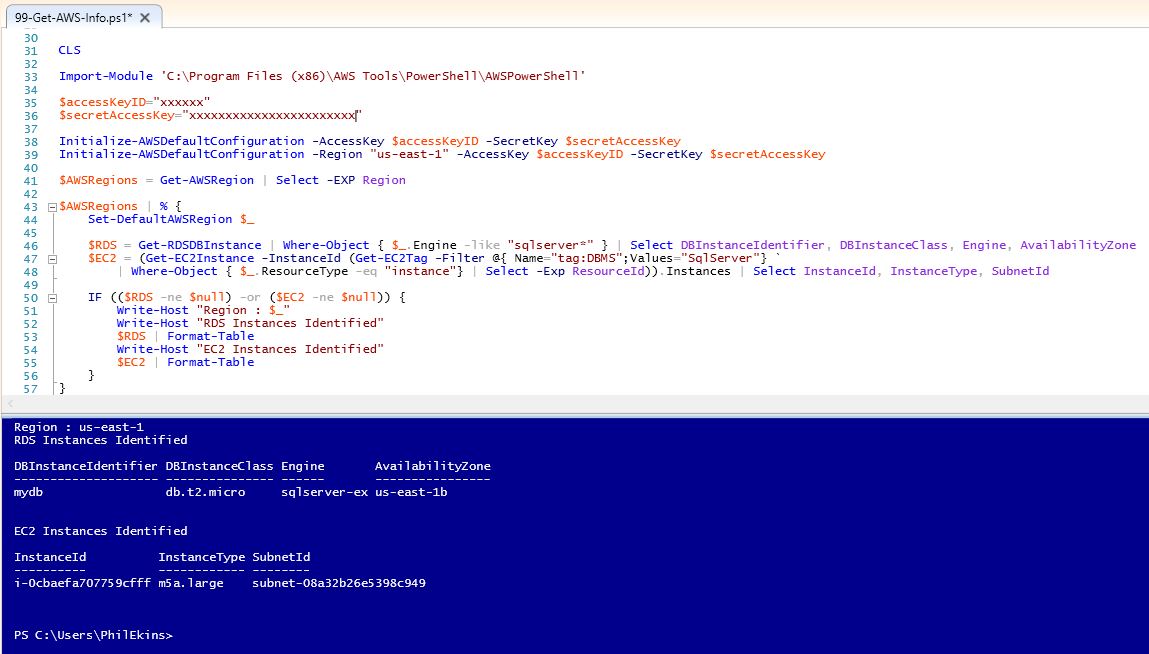
AWS Inventory
With AWS, the Web Management Console is naturally filtered by Region, but by using tools such as AWS Config you can create a dashboard that pulls all of your regional objects into a single view.
Using PowerShell, we can query our AWS account to collect EC2 and RDS services related to SQL Server. Here we will utilize the Tag DBMS : SqlServer to identify the EC2 instances. RDS can be identified by DB Engine.
AWS is segmented by region, so we need to interrogate each region separately to find all resources.
CLS

Import-Module 'C:\Program Files (x86)\AWS Tools\PowerShell\AWSPowerShell'

$accessKeyID="xxxxxxxxx"
$secretAccessKey="xxxxxxxxxxxxxxxxxxxxxxxxxxxxxxxxx"

Initialize-AWSDefaultConfiguration -AccessKey $accessKeyID -SecretKey $secretAccessKey
Initialize-AWSDefaultConfiguration -Region "us-east-1" -AccessKey $accessKeyID -SecretKey
$secretAccessKey

$AWSRegions = Get-AWSRegion | Select -EXP Region

$AWSRegions | % {
Set-DefaultAWSRegion $_

$RDS = Get-RDSDBInstance | Where-Object { $_.Engine -like "sqlserver*" } | Select DBInstanceIdentifier, DBInstanceClass, Engine, AvailabilityZone
$EC2 = (Get-EC2Instance -InstanceId (Get-EC2Tag -Filter @{ Name="tag:DBMS";Values="SqlServer"} | Where-Object { $_.ResourceType -eq "instance"} | Select -Exp ResourceId)).Instances | Select InstanceId, InstanceType, SubnetId
IF (($RDS -ne $null) -or ($EC2 -ne $null)) {
Write-Host "Region : $_"
Write-Host "RDS Instances Identified"
$RDS | Format-Table
Write-Host "EC2 Instances Identified"
$EC2 | Format-Table
}
}
In Conclusion
While the various techniques discussed in this blog have some overlap, they give us the ability to collect our SQL Server footprints, both on premises and in the cloud. The MAP tool is a very powerful utility with functionality far beyond what we showed here. However it is a manual process to run (there are some third party utilities out there to assist in automation), and as we saw, it did not find all of our SQL installs on its own. The other scripting examples were more configurable in terms of automation, but the output varied between runs and some were potentially unacceptably intrusive to your corporate network.
The best approach is a combination of the above, in a scheduled and automated process.
In the next part of this blog will discuss the best strategy for using many of the techniques discussed above to create an automated collection process. We will also cover how best to use the list of SQL Servers you generated in terms of license review, consolidation, and migration considerations.