


Joe Grant, Principal Architect
In keeping with the use of templates, as we did in part one of this post, the next thing would be to install the Oracle Database software into the OS template that should already exist. The following describes installing 11g into a Linux VM.
Oracle Prerequisites
Prior to installing the Oracle database software there are several steps that need to be completed first, for the most part in no particular order.
Oracle Users and Groups
Create Linux users and groups required for Oracle. Change the UID and GID to best suit your environment.
# groupadd -g 500 dba
# useradd -g dba -u 500 –m –d /home/oracle oracle
SELinux
Disable SELinux as per Oracle documentation. This is no longer required by Oracle however it is still recommended.
# setenforce 0
# vi /etc/selinux/config
config:
SELINUX=disabled
Software Firewall
Disable iptables.
# service iptables stop
# service ip6tables stop
# chkconfig iptables off
# chkconfig ip6tables off
Required Packages
Once the base OS has been installed and VMware tools is running additional software packages will need to be installed. The first step is to configure a YUM repository and then to install the packages with yum. This can be either through RHN or by setting up the install media as a repository. The following example uses the media solution.
- Mount the ISO to the optical drive through vSphere client, and then mount to the /mnt directory.
- Create the file /etc/yum.repos.d/rhel-media.repo.
[dvd]
name=Red Hat Enterprise Linux Installation DVD
baseurl=file:///mnt/Server
enabled=1
- Import the PGP key.
# cd /mnt
# rpm –import RPM-GPG-KEY-RELEASE
- Verify that all is working with a simple yum search.
- Install the required packages. This will install all of the Oracle required packages for Oracle Database 11.2 on RedHat 6 with a minimal install.
# yum install gcc.x86_64 libaio.i686 libaio.x86_64 libaio-devel.i686 libaio-devel.x86_64 compat-libstdc++-33.i686 compat-libstdc++-33.x86_64 elfutils-devel.i686 elfutils-devel.x86_64 gcc-c++.x86_64 libstdc++-devel.i686 libstdc++-devel.x86_64 glibc.i686 glibc.x86_64 glibc-devel.i686 glibc-devel.x86_64 glibc-headers.x86_64 unixODBC-devel.i686 unixODBC-devel.x86_64 sysstat.x86_64 libstdc++.x86_64 libstdc++.i686 libgcc.x86_64 unixODBC.i686 unixODBC.x86_64 libgcc.i686 ksh
In addition to the packages listed it is also recommended to install vncserver, xterm and twm. This will provide the required GUI environment for installing the Oracle Software.
Kernel Parameters
Oracle also requires certain kernel parameters to be set. The following is the list of required parameter settings to be set in /etc/sysctl.conf. These are the default values to get the Oracle software installed.
kernel.shmmax = 68719476736
kernel.shmmni = 4096
kernel.sem = 500 32000 500 128
fs.aio-max-nr = 1048576
fs.file-max = 6815744
net.ipv4.ip_local_port_range = 9000 65500
net.core.rmem_default = 1048576
net.core.rmem_max = 4194304
net.core.wmem_default = 262144
net.core.wmem_max = 1048576
PAM
Add the following line to /etc/pam.d/login:
session required pam_limits.so
Security Limits
Update security limits by editing the /etc/security/limits.conf file.
oracle soft nproc 2047
oracle hard nproc 16384
oracle soft nofile 1024
oracle hard nofile 65536
oracle soft memlock unlimited
oracle hard memlock unlimited
Oracle Linux 6 has another file setting the nproc value: /etc/security/limits.d/90-nproc.conf
* soft nproc 1024
Need to change to 2047 for Oracle 11.2.
Global Profile
Update the global profile, /etc/profile.
if [ $USER = “oracle” ]; then
ulimit -u 16384
ulimit -n 65536
fi
Network Configuration
With RHEL 5.8 and above, network manager was introduced. It is recommended to disable network manager and to configure network interfaces manually. Network manager should not be a part of a minimal install, but it is best to verify. To disable network manager run the following commands:
service NetworkManager stop
chkconfig NetworkManager off
For each network interface configuration file, add the following options:
vi /etc/sysconfig/network-scripts/ifcfg-eth0
NM_CONTROLLED=no
ONBOOT=yes
Restart the network to test.
RHEL 6
A udev rule is also in place on RHEL 6.x to configure network interfaces. The rule is /etc/udev/rules.d/70-persistent-net.rules. This file may have to be changed if the eth number is not as desired for the network adapter. This happens with VMware templates where deploying a template assigns a new MAC address to the network adapter in the VM. For example:
# PCI device 0x8086:0x100f (e1000)
SUBSYSTEM==”net”, ACTION==”add”, DRIVERS==”?*”,
ATTR{address}==”00:0c:29:ab:d3:df”, ATTR{type}==”1″, KERNEL==”eth*”, NAME=”eth0″
# PCI device 0x8086:0x100f (e1000)
SUBSYSTEM==”net”, ACTION==”add”, DRIVERS==”?*”,
ATTR{address}==”00:0c:29:38:86:a5″, ATTR{type}==”1″, KERNEL==”eth*”, NAME=”eth1″
In the previous example the active network adapter has a MAC address of 00:0c:29:38:86:a5. The old network adapter had a MAC address of 00:0c:29:ab:d3:df. With this udev rule in place, the network adapter will always have a label of eth1. To change this the udev rule must be manually modified. Change the udev rule as follows:
# PCI device 0x8086:0x100f (e1000)
SUBSYSTEM==”net”, ACTION==”add”, DRIVERS==”?*”,
ATTR{address}==”00:0c:29:38:86:a5″, ATTR{type}==”1″, KERNEL==”eth*”, NAME=”eth0″
To manually set the network properties, create or edit the file /etc/sysconfig/network-scripts/ifcfg-eth0.
DEVICE=eth0
BOOTPROTO=static
IPADDR=172.16.182.200
NETMASK=255.255.255.0
ONBOOT=yes
NM_CONTROLLED=”no”
IPV6INIT=no
Oracle Software Installation
The following are the screen shots for installing the Oracle Database Software. To start off with a vncserver session should be started and the software should be staged to the VM.
Figure 1 Oracle Software Installation
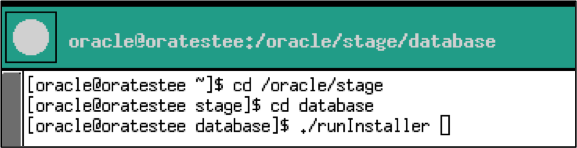
Next cd to the directory where the software was unzipped and run the script runInstaller.
Figure 2 Configure Security Updates
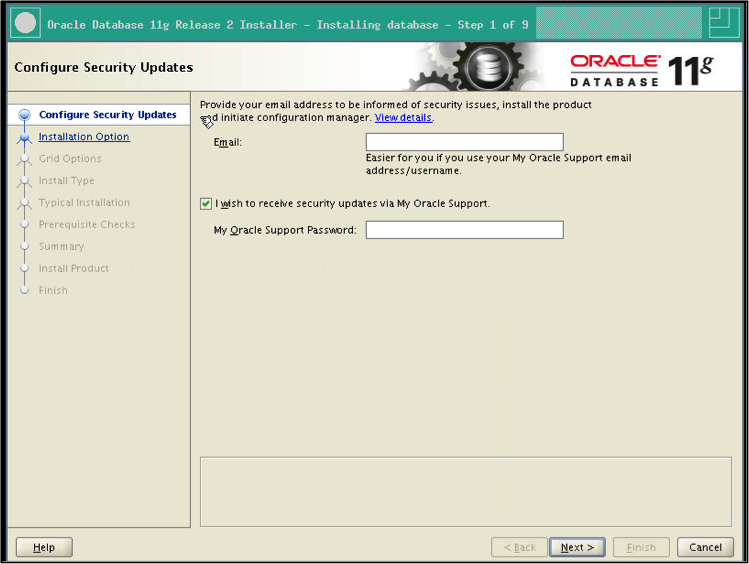
Do not provide any e-mail addresses.
Figure 3 Email Address Not Specified
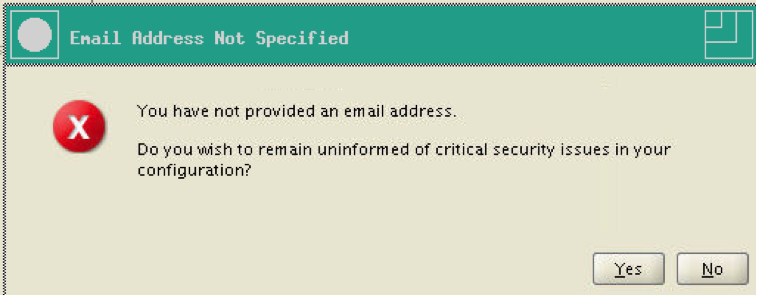
Select yes. There are other and better ways to keep up on security alerts than to let Oracle monitor things.
Figure 4 Installation Option
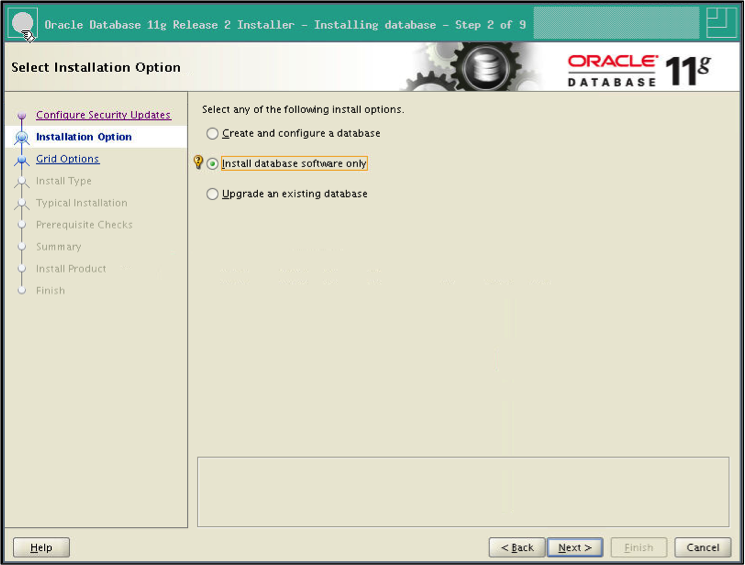
Install the software only.
Figure 5 Grid Options
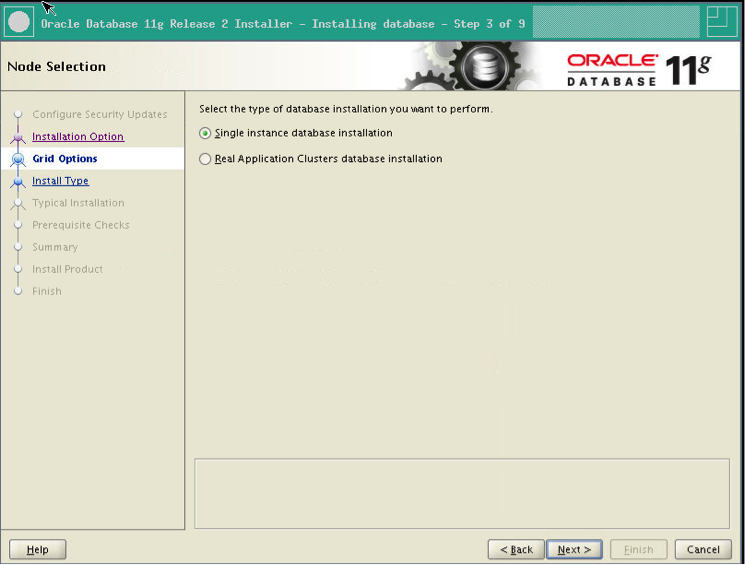
This will be a single instance database.
Figure 6 Select Product Languages
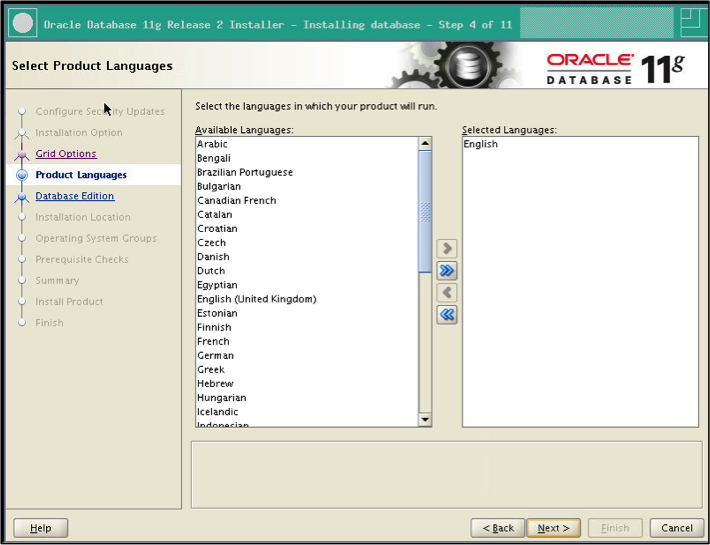
Select all languages that need to be supported.
Figure 7 Database Edition
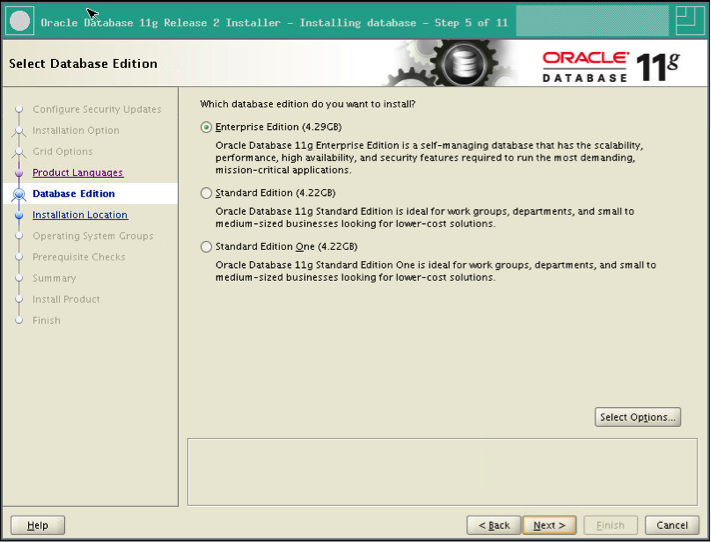
Select the database edition.
Figure 8 Specify Installation Location
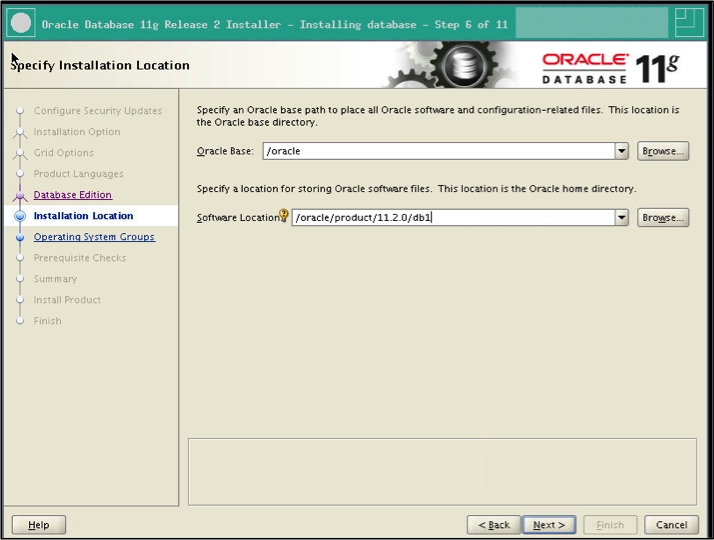
Select the appropriate directories.
Figure 9 Create Inventory
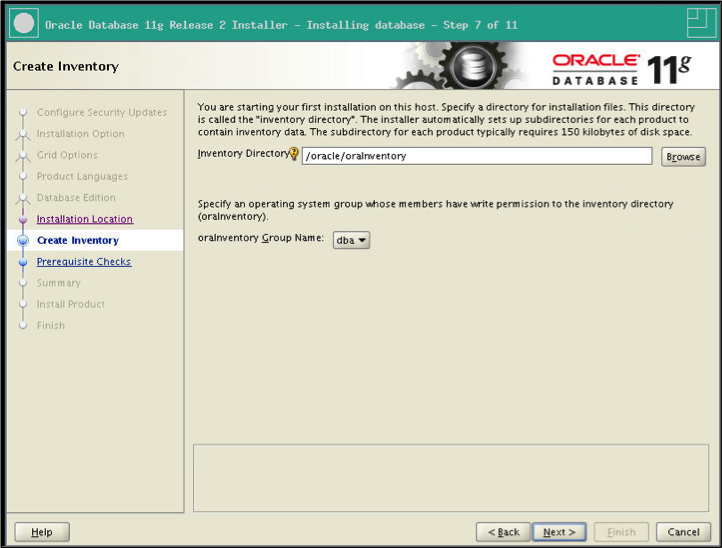
Select the inventory directory and DBA group.
Figure 10 Central Inventory
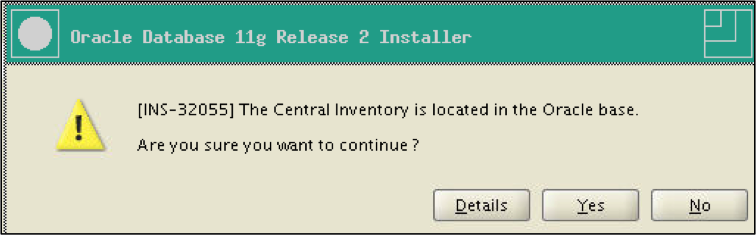
Oracle does not recommend that oraInventory be under the ORACLE_BASE directory. In practice it works well. Simply select yes.
Figure 11 Privileged Operating System Groups
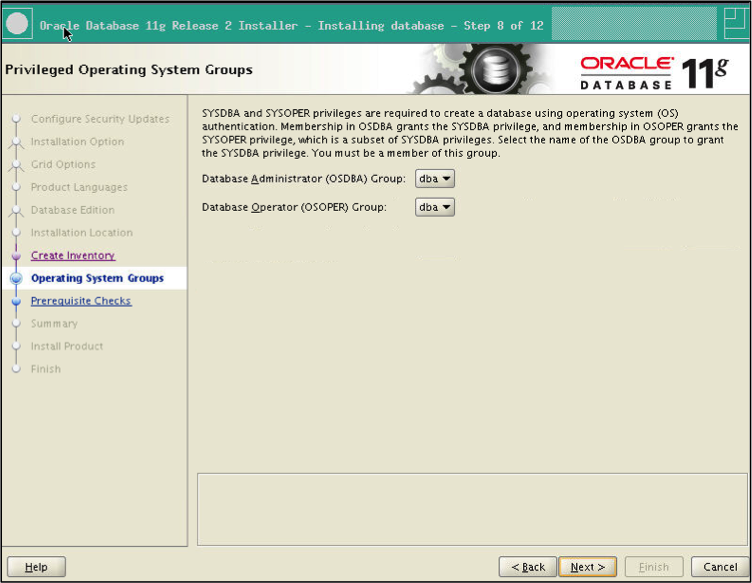
Again select the dba group.
Figure 12 Perform Prerequisite Checks
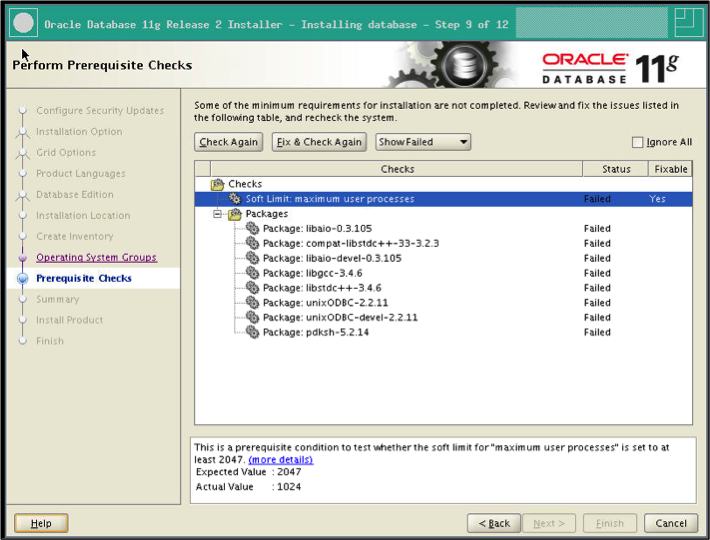
Prerequisite checks. In this case newer versions of these packages were already installed. Simply select the ignore all check box.
Figure 13 Install Product
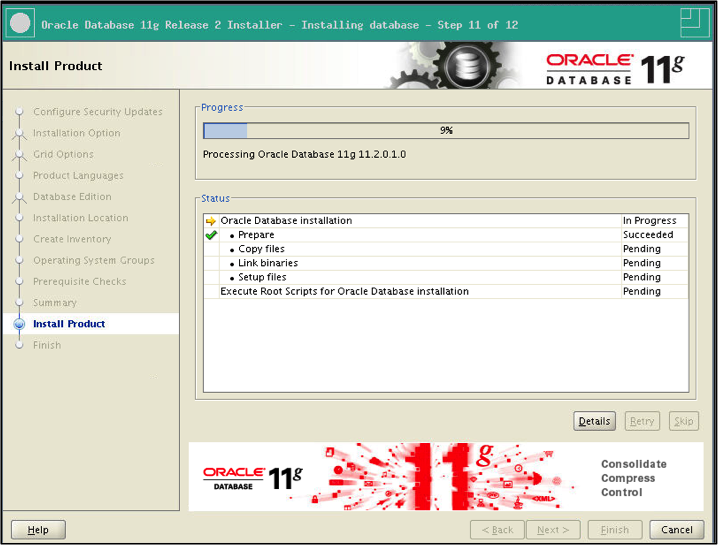
Installation progress.
Figure 14 Execute Configuration Scripts
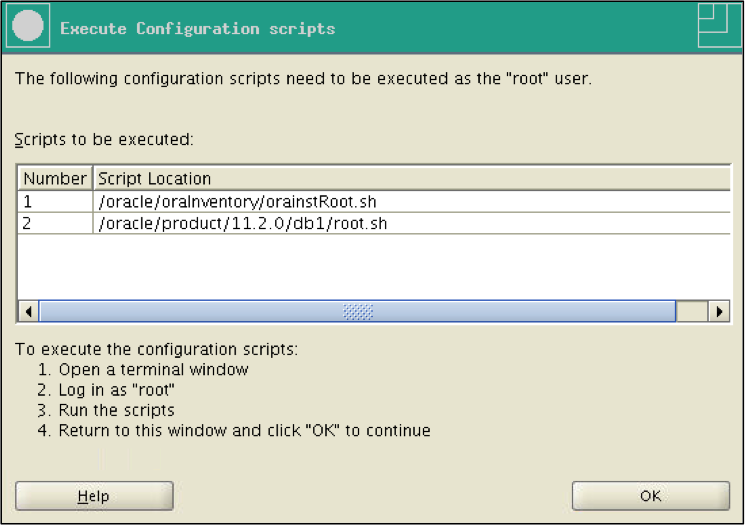
Before the installation is complete the following scripts need to be run as root.
orainstRoot.sh:
Changing permissions of /oracle/oraInventory.
Adding read,write permissions for group.
Removing read,write,execute permissions for world.Changing groupname of /oracle/oraInventory to dba.
The execution of the script is complete.
root.sh:
Running Oracle 11g root.sh script…The following environment variables are set as:
ORACLE_OWNER= oracle
ORACLE_HOME= /oracle/product/11.2.0/db1Enter the full pathname of the local bin directory:
[/usr/local/bin]:
Copying dbhome to /usr/local/bin …
Copying oraenv to /usr/local/bin …
Copying coraenv to /usr/local/bin …Creating /etc/oratab file…Entries will be added to the /etc/oratab file as needed by
Database Configuration Assistant when a database is created
Finished running generic part of root.sh script.
Now product-specific root actions will be performed.
Finished product-specific root actions.
Figure 15 Finish Screen
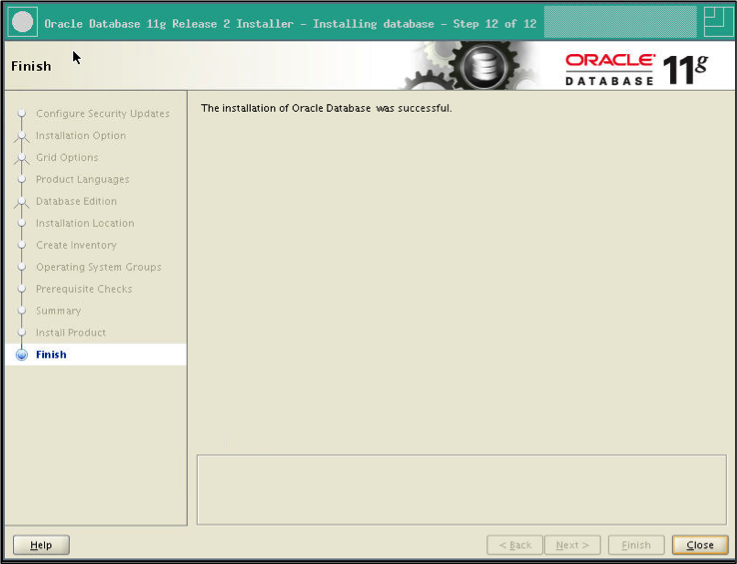
Completion screen.