


Jim Hannan (@HoBHannan), Principal Architect
I was working on some documentation for a client and started thinking back on how long we have been using IOMeter — my best guess is since 2007. It is a great tool. You could argue that there are newer, better suited tools for database I/O testing available like:
- SLOB
- Oracle ORION
- SQLIO
Nevertheless, I continue to use and recommend IOMeter. I think it is because of its approachability and simplicity. Is this blog I will cover the usage, history, and how to configure and run IOMeter.
The History of the Open unofficial storage thread
Back in March 2009, a group of vSphere administrators got together and created a standard set of test to run on their storage unit. The thread is still active (although you are redirect to a new thread branch) here.
The purpose of the thread was to compare and test storage arrays before virtualizing workloads. The results were uploaded via CSV files or pasted into the forum to compare results against other storage units. It became essentially a database to compare data. The thread lives on today and hundreds maybe thousands of results. You can often find your exact model and compare results. Obviously a model is not the only determining factor in throughput, but it gives administrators a really good way to determine if performance is where it should be.
IOMeter Only on Windows
All of the tests in Open unofficial storage thread are conducted using a tool called IOMeter. IOMeter is licensed under the GPL (GNU Public License) and was written and distributed by Intel back in 1998. The primary application runs on Windows — there is a Linux binary, but it was written for older Linux kernel that can do only synchronous I/O not the faster more efficient asynchronous mechanism of today. For those of you unfamiliar with the difference in the async kernel and sync kernel, it is dramatic. Think of your I/O as water dripping out of a faucet. Now compare it to faucet running full blast. For this reason the only approachable solution is to run it on Windows, which for many customers make it less attractive for I/O testing. That being said, I am still an advocate for running IOMeter in Linux based shops. Remember that you are testing for I/O throughput not the OS. Something else I should tell you: NTFS v5 is faster than Linux ext3.
Since 2007, HoB has run thousands of test using IOMeter for customers and recorded the results. Below I have included the steps for IOMeter setup for Windows 2008.
IOMeter Setup
To install IOMeter, double-click on the executable and follow the prompts. After the installation is finished, click on the Iometer icon to start the GUI and complete the basic configuration.
To run IOMeter on Windows Server 2008
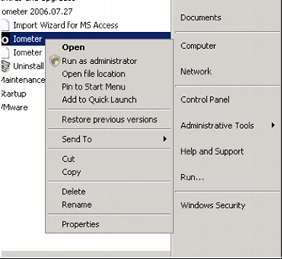
Right-click IOMeter and select Run as administrator to run IOMeter with administrative privileges.
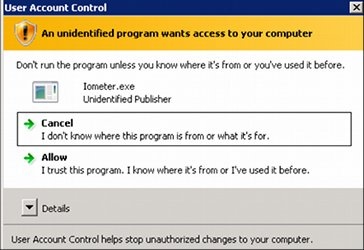
In the User Account Control window, select Allow.
After IOMeter starts, a window called C:Program Files(x86)I…opened with Iometer is displayed. This thread drives the I/O and file creation. Do not close it.
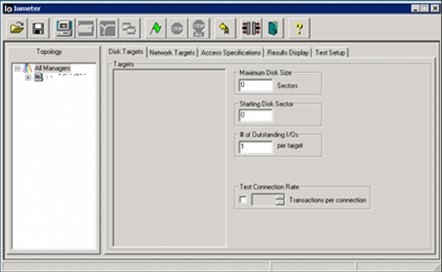
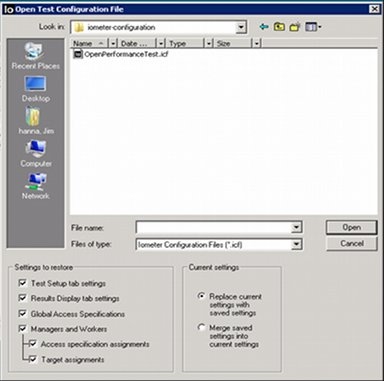
Select Open and go to the OpenPerformanceTest.icf configuration file location. The default configuration file is a standard agreed upon by a group of users who test VMware I/O performance. You can modify the file, but the default configuration file is often a good starting point for testing. The file and user forum are available at http://communities.vmware.com/thread/73745.
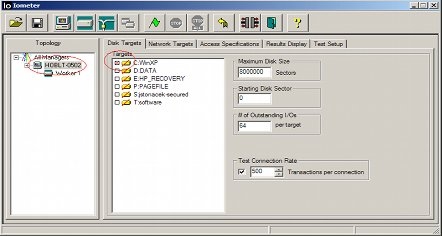
Select Worker 1, and then select the drive. This creates the test output file if it does not already exist. IOMeter creates a 4GB test output file by default.
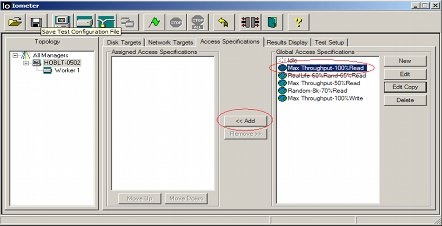
Under the Access Specifications tab, select a test and click Add. This example selects Max Throughput – 100% Read.
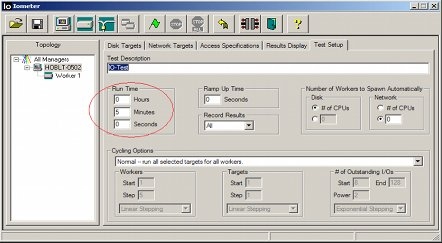
Under the Test Setup tab, confirm that the settings are correct. The default values might be OK. You can modify the length of the test in the Run Time section.
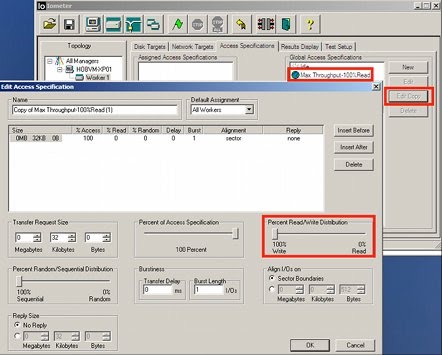
For a write test, select the Max Throughput – 100% Read test, select Edit Copy and change the slider Percent Read/Write Distribution to 100% Write. For a read test, select Max Throughput – 100% Read. This test usually exposes any problems with the storage configuration, ESX/ESXi host, HBAs, or drivers.
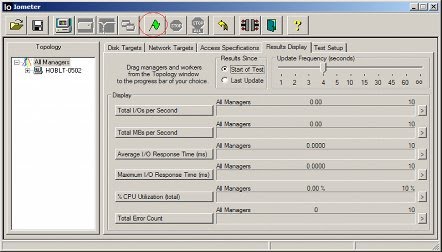
Under the Results Display tab, change the Update Frequency to 4 and select Last Update. Click Run Test (the green flag icon).
IOMeter asks for a filename to save the results. The results are written to a .CSV file with the data from the test. After the results file is specified, the test begins.
IOMeter first prepares a file for use by the test. If the defaults are used from the .icf configuration file, the file is 4GB and is named iobw.tst. The first time IOMeter runs it generates this file, so the actual test is delayed until the file is ready. Subsequent tests on the same drive use the existing file, so a new file is not generated.
The iobw.tst file must be manually cleaned up after testing is complete.
SUMMARY
At HoB we really encourage customers to adopt a standard set of benchmarking tests. There is so much to gain by doing so. A big part of benchmarking is testing I/O — and IOMeter is a good tool to assist with that. If you have any questions or comments let me know @HoBHannan.